As I have stated in previous posts I am currently trying to get my head around Home Assistant and Dashboards in particular. I am slowly working up to having a dashboard display on an old Android tablet.
I decided that I’d like a project that could show how Home Assistant could be used for more than simply turning on and off the lights, and what would be useful to me would be a display showing a list of the next bus arrivals at our nearest stop.
I found that our local bus company, Reading Buses, has an api that provides the information that I was interested in. This api is provided by a company called R2P who provide data services to several bus companies. For example, to my knowledge, both Oxford and Plymouth use the same service and so the following should work for them as well as any company that uses r2p.
From XML to JSON
The r2p api is odd in that some endpoints return JSON and others XML and there doesn’t seem to be a way of choosing which you get. I think that that’s because the realtime information, which I was interested in, conforms to the Service Interface for Real Time Information which is XML and the rest are JSON.
Had the output from the live times endpoint been in JSON it would have been possible to directly connect that to Home Assistant but as it is in XML that wasn’t an option so I wrote a connector to convert to JSON and it is that which Home Assistant connects to. Therefore it looks like this:

The PHP Connector code and details on how to set it up can be found on my Github page here.
Adding to Home Assistant
There are two stages to added the card to Home Assistant. The first is to gather the information and the second is to plumb it in.
Find your stop
Once you have the connector setup and working you need to find the stop (or stops) that you are intersted in. You can do that by going to:
https://<your domain>stops.phpYou should see a screen similar to the following. Make a note of the location code(s) as you will need those later

Build your link
Now that you have your location code you can build the URL that you will need to use with Home Assistant. The PHP code, arrivals.php, takes a couple parameters as follows:
- stop – your location code
- line – a comma-separated list of bus routes at that stop that you are interested in.
To add more detail to the “line” parameter if your stop had five routes that used it (5, 10, x24, 37 and 21) you can limit which ones you are interested through this (5, 21 for example) and only those will be returned.
Your final URL might look something like this:
https://<your domain>/arrivals.php?stop=039026160001&line=50Add to configuration.yml
The first thing you need to do is to tell Home Assistant about the connector which is done by adding the following to your configuration.yml file and then restarting HA.
You will note that this gets added as a sensor as that’s what HA understands and this sensor consumes the JSON from the PHP connector.
rest:
  - scan_interval: 60  # Update every minute (buses update frequently)
    resource: https://bus.nei.lt/arrivals.php?stop=039026160001&line=50
    sensor:
      # Sensor to show all upcoming buses
      - name: All Upcoming Buses
        unique_id: all_upcoming_buses
        value_template: "{{ value_json.buses | length }} buses scheduled"
        icon: mdi:bus-multiple
        json_attributes:
          - buses
If you have duplicate stops that you are interested in just duplicate this block remembering to change the resource, name and unique_id.
Add a card to your dashboard
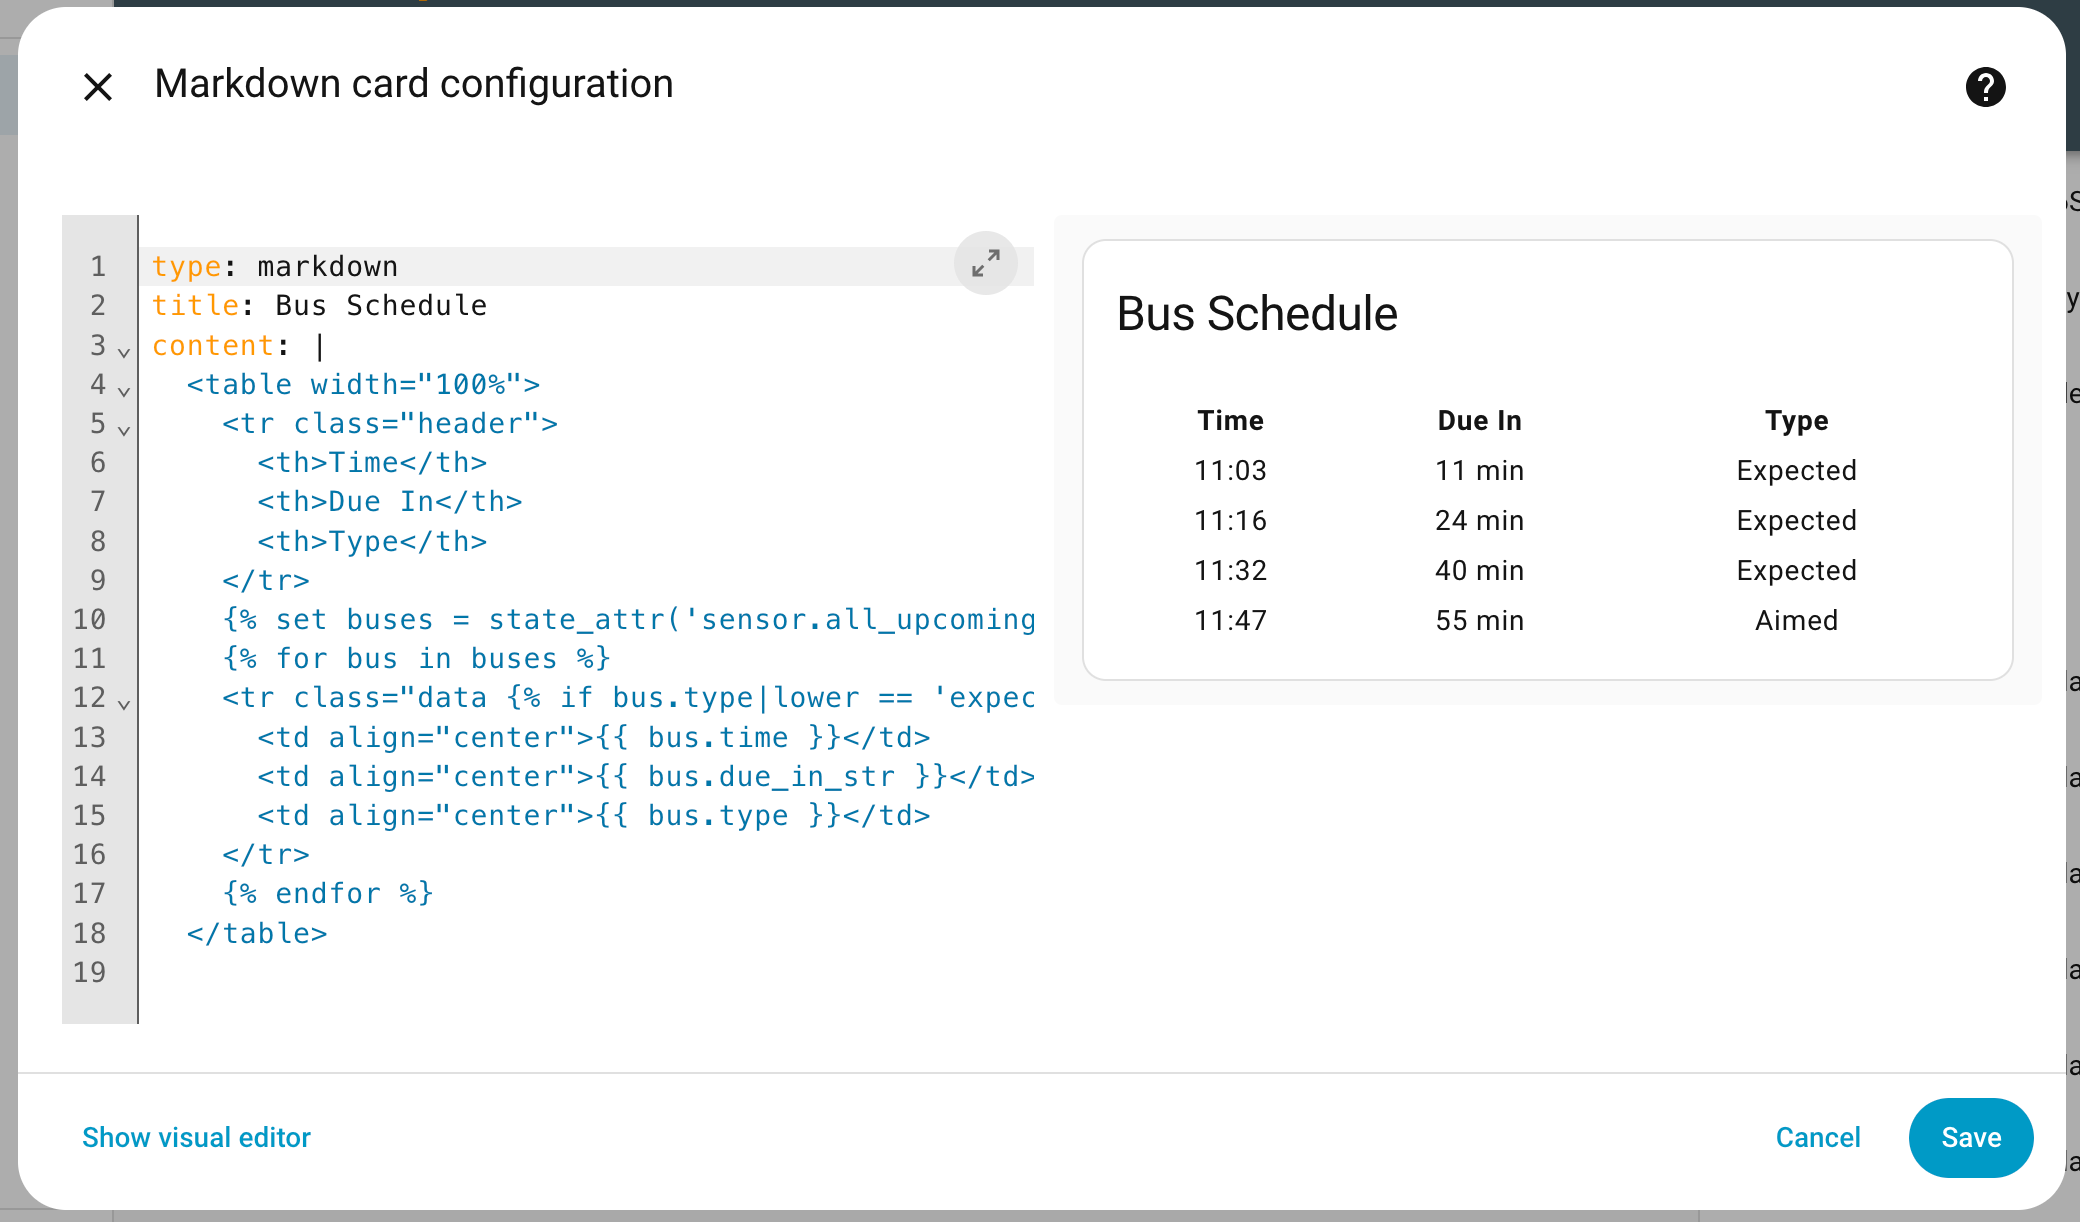
The final job is to add a new card to your dashboard and paste the following in:
type: markdown
title: Bus Schedule
content: |
  <table width="100%">
    <tr class="header">
      <th>Time</th>
      <th>Due In</th>
      <th>Type</th>
    </tr>
    {% set buses = state_attr('sensor.all_upcoming_buses', 'buses') %}
    {% for bus in buses %}
    <tr class="data {% if bus.type|lower == 'expected' %}expected{% endif %}">
      <td align="center">{{ bus.time }}</td>
      <td align="center">{{ bus.due_in_str }}{% if bus.due_in > 1 %}s{% endif %}</td>
      <td align="center">{{ bus.type }}</td>
    </tr>
    {% endfor %}
  </table>
If all has gone well you should see a card that looks similar to the following. If not check the spacing at the beginning of each line in the “content” section as YAML is very picky about it or paste it into an online YAML validator to check.

One comment on “Home Assistant – Bus Stop Times”