For my birthday last year I was bought a Raspberry Pi Camera Module 3 which I’d wanted for a while. I’d decided that I wanted to create a time-lapse video showing the change in seasons in the back garden. The rest of this article describes what I did and the results.
Setting up
As this didn’t require a huge amount of computing power I paired the camera module with a Raspberry Pi Zero 2W.
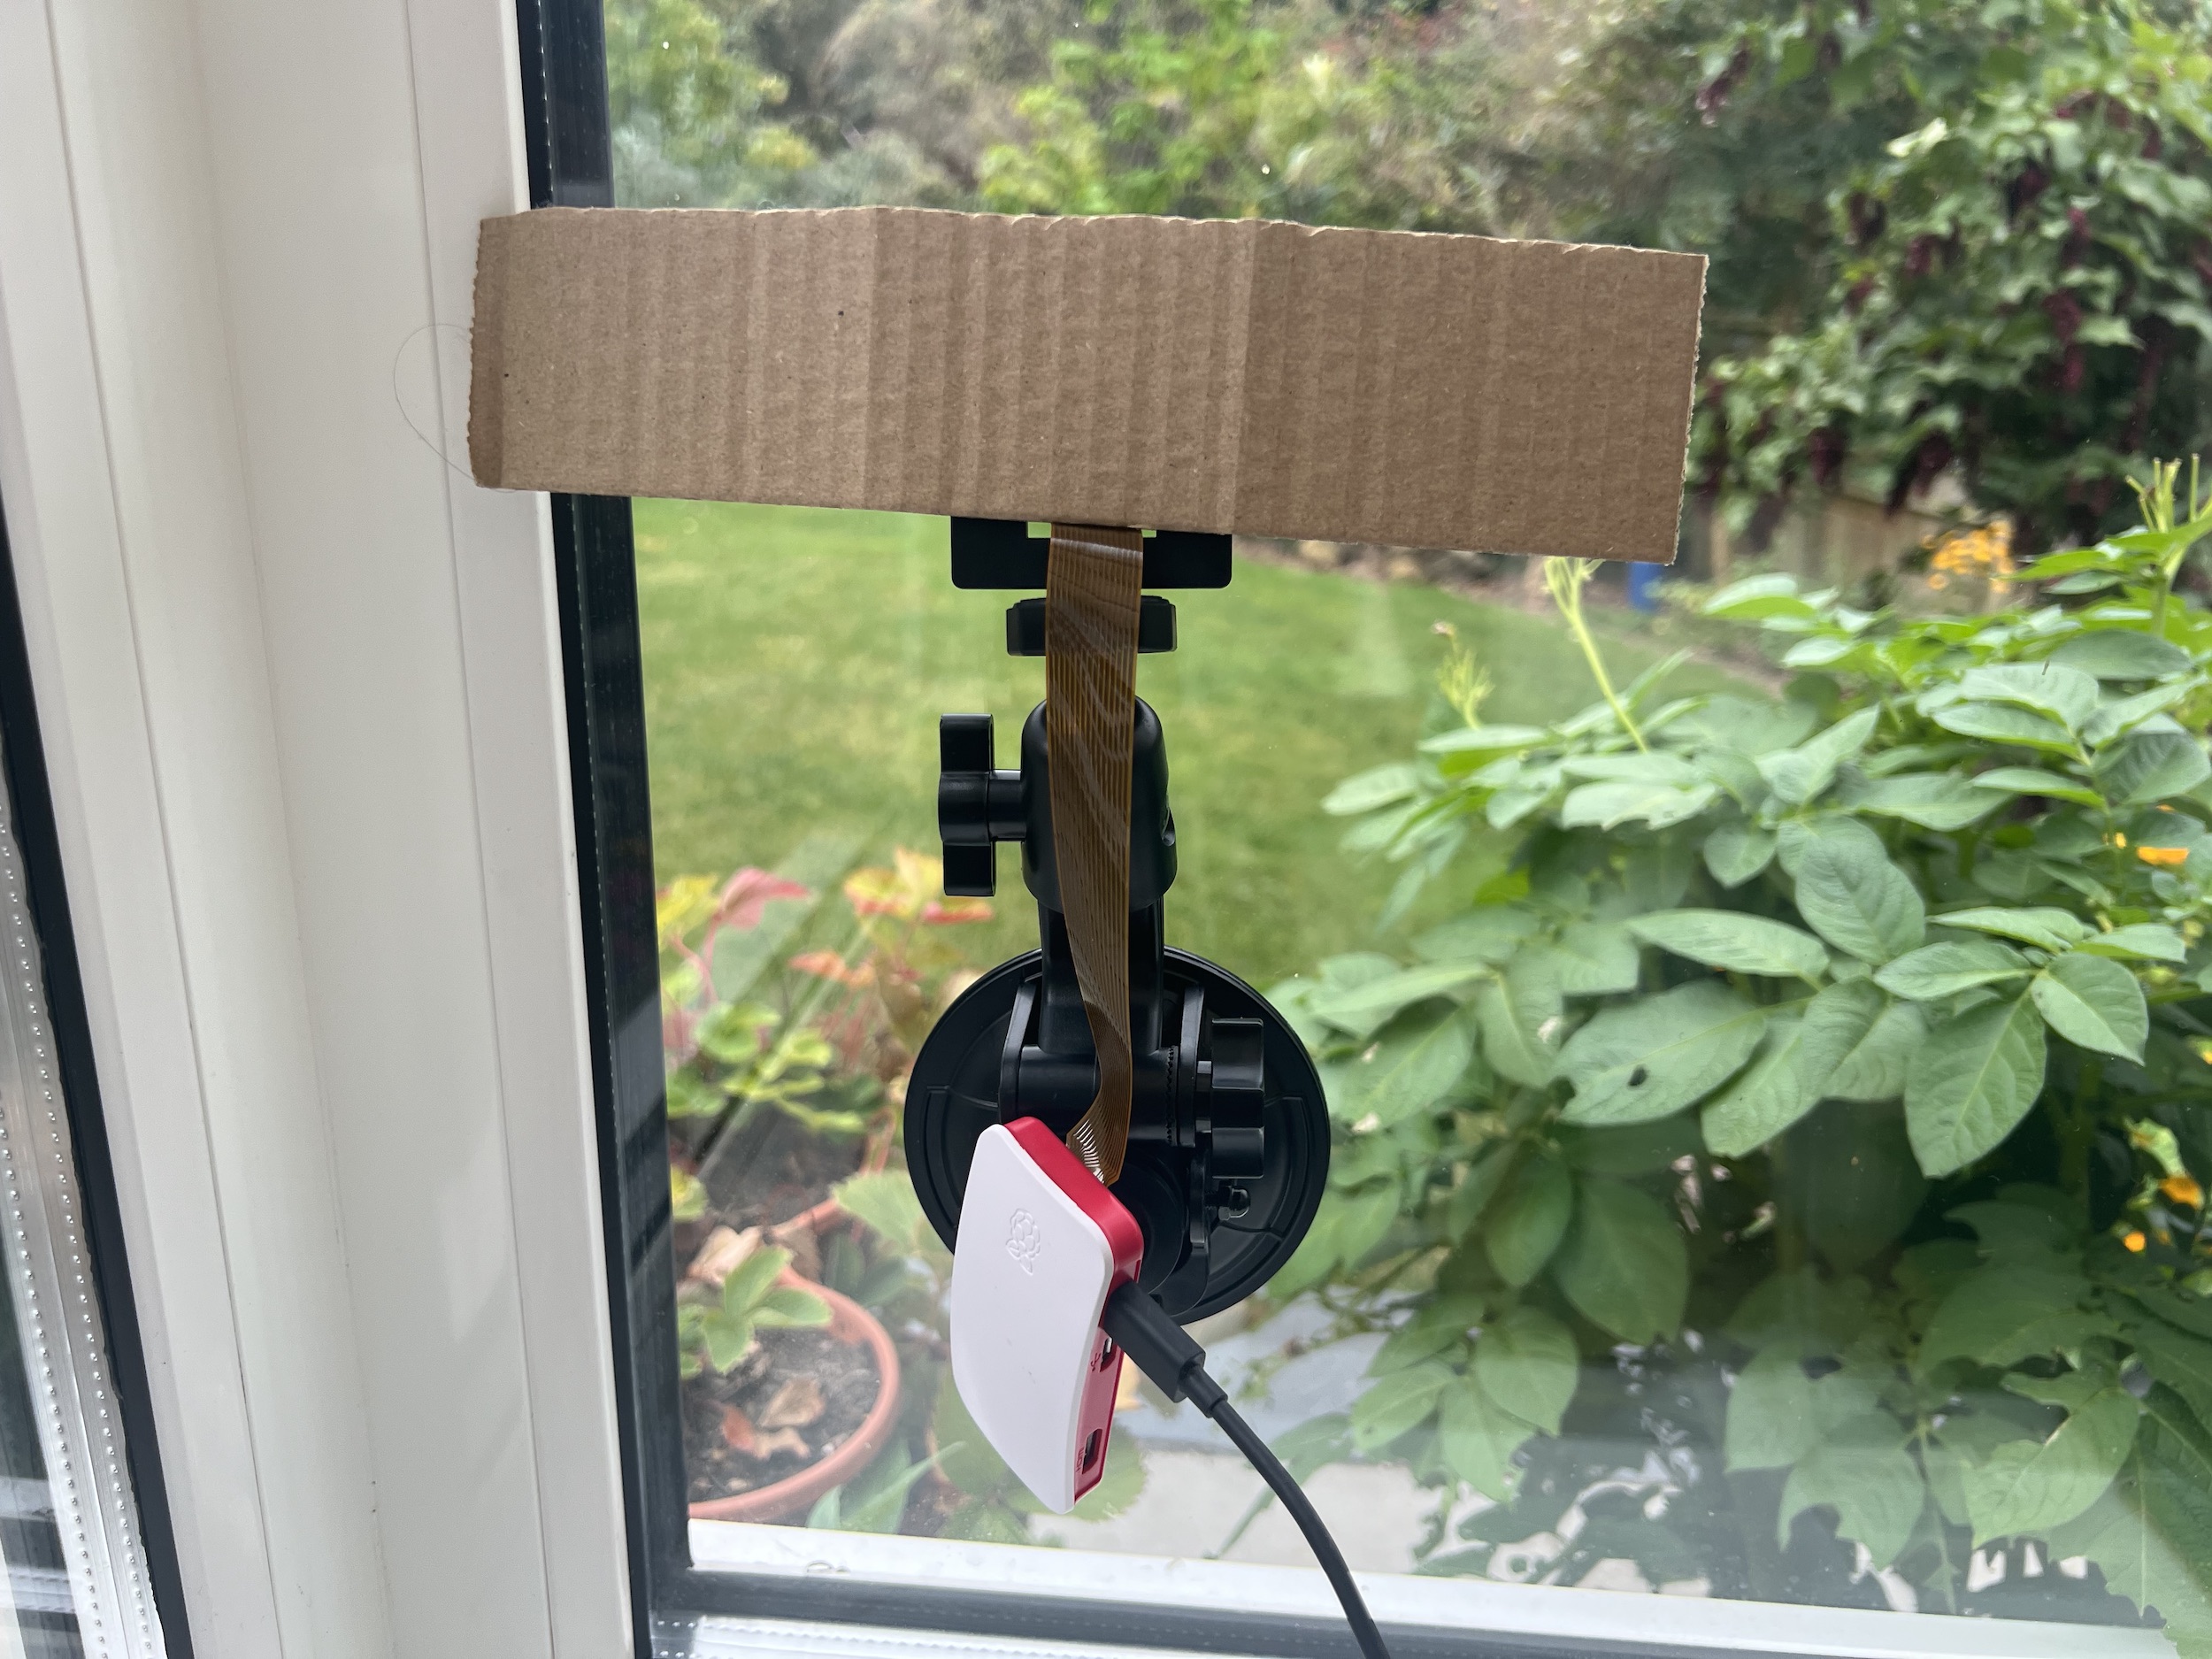
That turned out to be the easy bit! Getting it fixed such that there weren’t any reflections from the window took a bit of creativity. What I ended up with was the rather Heath Robinson affair that you can see in the image above.
As you will see from the videos below in the first minute or so the position of the camera was all over the place. Mounting the camera on a Car Suction Cup Mount stopped the movement and got the lens close enough to the window to cut out most reflections. The addition of the cardboard helped further. My one remaining challenge is persuading the cardboard to stay in place. That may need some superglue!
Getting and Storing Images from the Camera
With the hardware in place I could turn to the software. The Raspberry Pi OS (previously known as Raspberian) comes with the libraries you need to access the camera – imaginatively called libcamera. In it’s simplest form libcamera allows you to access the camera and it returns an image that you can save. The code snippet below does just that:
    // take an image and put it in the output folder
    $fn = "image_".date("Y_m_d_G_i").".jpg";
    exec('libcamera-jpeg -o /home/camera/images/'.$fn, $output, $result);
    if ($result==0){
        echo 'Success'.PHP_EOL;
    }else{
        echo 'Failure'.PHP_EOL;
    }
This stores all the images locally which is fine if you have a memory card large enough but I also wanted to be able to access the images elsewhere so I also uploaded the images to an S3 bucket. I haven’t included that code here as doing so is well documented elsewhere.
All that remained was to schedule the script in cron to run hourly on the hour.
Converting Images to Video
I left it running for four months before I decided that it was time to grab the images and see if I could turn them into a video. I zipped up the images and transferred them to my MacBook. This is when you need more power than the Pi Zero has as it took a good hour to transfer the file across.
With all the images in one folder, it was relatively straightforward to take them all and convert them using the ever-reliable ffmpeg to an MPEG-4 file. The command below takes all JPEG images in the current folder and outputs an MP4 file with one image per second.
~/Development/ffmpeg -framerate 1 -pattern_type glob -i '*.jpg' -c:v libx264 -r 30 -pix_fmt yuv420p output.mp4
ffmpeg threw some deprication warnings but these were nothing to worry about. Finally, I used LumaFusion to add some music to the video. LumaFusion is actually an iPad app but you can run it on Apple Silicon of my M2 MacBook Pro and it works perfectly.
You can see the final hour-long video below…
Removing the Black Images
Looking at the video it quickly became clear that overnight is not especially enlightening as all you see are black images. Now, libcamera does have some settings that allow you to adjust the sensitivity but you would need to change the value depending on both the time of day and when in the year it is. Longer term I have an idea to use the PHP date_sun_info function to work out the best setting or maybe just buy a Night Vision Camera for Raspberry Pi but for now the easiest thing was simply to just delete the black images – but how?
For this, I turned to ChatGPT and asked it: “Can you write me a script that I can run on my Mac that goes through all jpeg images in a folder and deletes any files where the image is just black”. This is what it came up with using its weapon of choice – Python:
from PIL import Image
import os

def is_image_black(image_path, threshold=10):
    img = Image.open(image_path)
    img_data = img.getdata()

    # Check if all pixel values are below the threshold
    black_pixels = sum(1 for pixel in img_data if sum(pixel) <= threshold)

    # Adjust the threshold based on your preference
    return black_pixels / len(img_data) > 0.99  # 99% black pixels for simplicity

def delete_black_images(folder_path):
    for filename in os.listdir(folder_path):
        if filename.lower().endswith('.jpeg') or filename.lower().endswith('.jpg'):
            file_path = os.path.join(folder_path, filename)

            if is_image_black(file_path):
                os.remove(file_path)
                print(f"Deleted: {filename}")

if __name__ == "__main__":
    folder_path = input("Enter the folder path: ")

    if os.path.exists(folder_path):
        delete_black_images(folder_path)
        print("Black images deletion completed.")
    else:
        print("Folder not found. Please provide a valid folder path.")
I set it off and it worked straight out of the box which was pretty impressive. Now I had a video that was half as long and only included the bits you could actually see.
Adding the Date to each File
The final thing I wanted to do was to add a timestamp to each image so you’d know when it was taken. I wanted it to look a little like old film cameras used to do. Again I asked ChatGPT to write me a script to do this and it took a lucky 13 goes before it finally got something that worked to my satisfaction. This is the final code:
from PIL import Image, ImageDraw, ImageFont
import os
from datetime import datetime

def ordinal(number):
    if 10 <= number % 100 <= 20:
        suffix = 'th'
    else:
        suffix = {1: 'st', 2: 'nd', 3: 'rd'}.get(number % 10, 'th')
    return str(number) + suffix

def get_date_from_filename(filename):
    try:
        date_str = filename.split('_')[1:6]
        date_str[-1] = os.path.splitext(date_str[-1])[0]  # Remove file extension
        date_obj = datetime.strptime("_".join(date_str), "%Y_%m_%d_%H_%M")
        formatted_date = date_obj.strftime("%A, {day} %B %Y %H:%M").format(day=ordinal(date_obj.day))
        return formatted_date
    except Exception as e:
        print(f"Error extracting date from filename {filename}: {e}")
        return None

def add_date_to_image(image_path, output_path, font_path):
    try:
        img = Image.open(image_path)
        draw = ImageDraw.Draw(img)

        # Load a TrueType font (replace with the path to your downloaded font file)
        font = ImageFont.truetype(font_path, 80)

        date_str = get_date_from_filename(os.path.basename(image_path))
        if date_str:
            # Fixed position for the text
            position = (50, img.size[1] - 120)
            draw.text(position, date_str, font=font, fill="orange")

            img.save(output_path)
            print(f"Date added to: {os.path.basename(image_path)}")
    except Exception as e:
        print(f"Error processing image {image_path}: {e}")

def add_date_to_images_in_folder(folder_path, font_path):
    for filename in os.listdir(folder_path):
        if filename.lower().endswith('.jpeg') or filename.lower().endswith('.jpg'):
            file_path = os.path.join(folder_path, filename)
            output_path = os.path.join(folder_path, "dated_" + filename)

            add_date_to_image(file_path, output_path, font_path)

if __name__ == "__main__":
    folder_path = input("Enter the folder path: ")
    font_path = input("Enter the path to the TrueType font file (e.g., /path/to/arial.ttf): ")

    if os.path.exists(folder_path) and os.path.exists(font_path):
        add_date_to_images_in_folder(folder_path, font_path)
        print("Date addition to images completed.")
    else:
        print("Folder or font file not found. Please provide valid paths.")
And this is the final video excluding the black night-time images and with a date and time stamp in the bottom corner.
Over the next few months I intend to improve the nighttime images and, once I have a full year’s images, create what I set out to achieve – a video of the garden through all four seasons.
2 comments on “Using a Raspberry Pi Camera to create a time-lapsed video”